Using Metal Clay with my "Shapes" Designs
Amanda Ellis
Shapes - 25 Inspirational Jewellery Designs in Polymer Clay
I invited four experienced metal clay artists to participate in my Gallery Section submission. I am very pleased to say that they were all successful in using my shape-making instructions intended for polymer clay and creating pendants from metal clay. Many thanks to Amanda Ellis who passed me her notes and tips on the process. And additional thanks to Jacqueline Wells, Carol Faith and Natalia Colman for their additional comments to Amanda's notes. I've summarized their "Metal Clay Tips" here. If you are experienced in working in metal clay and enjoy a challenge give it a try and I'd love to hear from you on your results! [email protected]
Size of Pendant
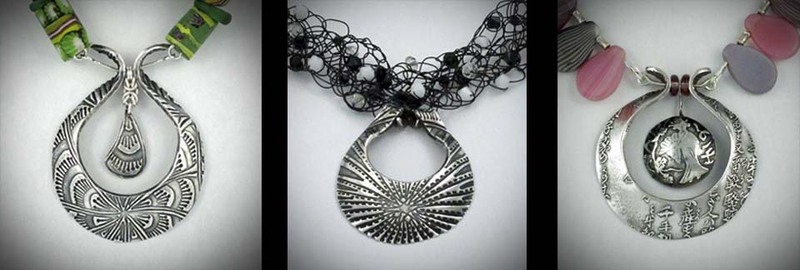
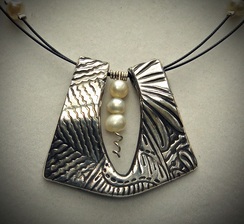
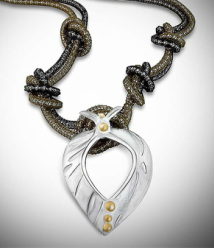
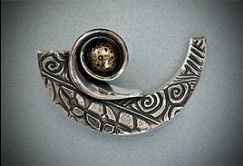
In the book on the first page of each design, under the finished pendant photo, the dimensions of the pendant are given. Polymer clay does not shrink during the curing stage but metal clay does. You will have to use a judgement call on whether you should adjust your cutter sizes up or down. Amanda choose to size down her Open Window 1 pendants, and found she had to improvise a bit with adjusting the inner cut because her cutters didn't quite have the same ratio as the instructions called for. Carol says she used the cutter size as given for Spiral Design 5 and it worked well.
Pendant Thickness
The suggested thickness for most of the designs in the book is 4 mm. When using metal clay it is not necessary to make your piece as thick because after firing the MC the silver is much stronger then polymer. This will reduce the weight of your finished piece and it will be more economical. Here's Jackie's suggestion: "I rolled my MC out to 5 cards thick and then used 4 cards when I textured the piece. After sanding and refining my design was probably between 3 and 4 cards thick. It ended up being a nice weigh for this open window design (Open Window Design 5)."
Bevelling Edges
Metal clay generally needs to be sanded down once leather hard, and all edges can be refined at that time. However 2 of the artists did find it helpful to follow the books instructions for bevelling edges: Carol & Jackie state: "I found that by using the plastic sheet as you suggested, I did not have to do as much sanding."
Stringing Holes
The instructions for most of the Open Window designs have you pierce the raw clay, side-to-side with a needle tool to create stringing holes. Amanda suggests: "Do not try to make the stringing holes when the clay is wet. Form the arms of your piece into the desired shape as soon as the clay has been draped over the domed support, and support with small pieces of un-cured polymer clay as necessary. Once the clay is leather hard and after sanding, use a pin vice or your preferred method to make the stringing holes"
If you are making the "fold back arms" style of bail, keep in mind the shrinkage factor to ensure the opening will be large enough for whatever cording you wish to use. Jackie suggests placing a small coffee straw to keep the loop open.
Support Forms
Several of the artists made and used the polymer support forms as described in the book. You can lightly coat with your regular preferred release material (e.g. badger balm) to avoid the wet clay sticking to the polymer. Also consider using straws for supporting the curves.
Natalia mentioned: "I found creating the polymer clay supporting shapes very satisfying and this is something that I will continue to use with my metal clay designs in future."
Follow the books instructions as to how to place your piece on its support form. In most cases the bottom edges should be flat on your non-stick surface.
Sanding
Once the clay is leather hard, carefully sand the back edge flat by placing face up on a flat piece of 600 grit paper and supporting the domed shape with your hand whilst moving the whole piece around the paper in a circular motion. Brush off the metal dust and check how the piece sits on a flat surface regularly to ensure you do not remove more material than necessary. Carefully sand the inner edge.


